Case 1: Interactive Testing
Goal
This example demonstrates a test case, which leads the tester through a manually executed test. The test scenario is a fictive test case, where the test is sitting in a vehicle with ecu.test running on a mobile computer.
General information about creating interactive tests can be found in section Interactive testing.
Test execution
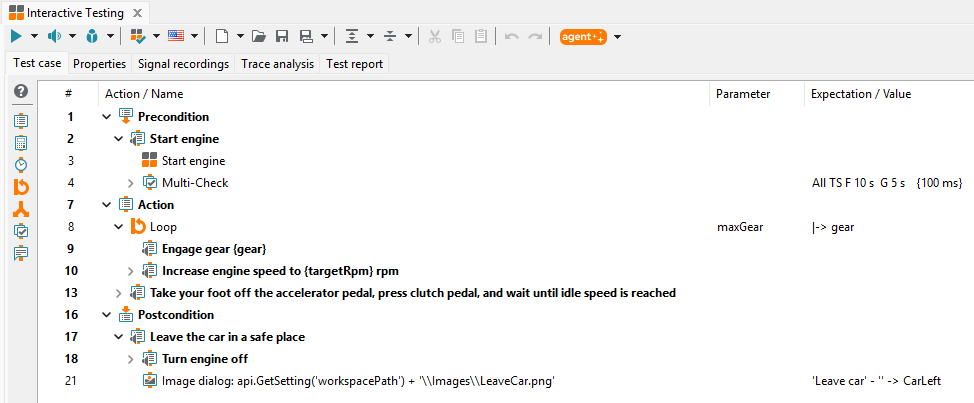
The package Interactive Testing.pkg contains the following test steps:
Start engine
Engage gear 1
Increase engine speed to 5000 RPM
Engage gear 2
Increase engine speed to 5000 RPM
Engage gear 3
Increase engine speed to 5000 RPM
Park car and stop engine
The interactive test is started via the start button with the speaker symbol in the tool bar of the package (or via keyboard shortcut F6).
User instructions are the texts of block test steps that are marked as “interactive” in there respective dialogs (see Creating an interactive test step).
The current block test step is being read out loud by computer voice. If the block test step has no subsequent test steps, the user has to select the result of block manually, using the buttons in the right corner of the dialog.
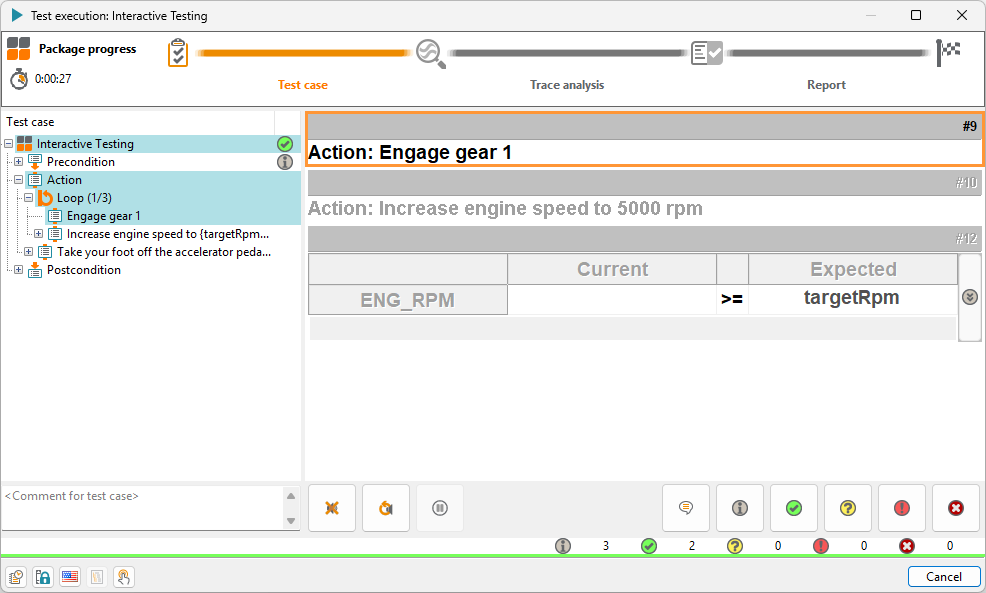
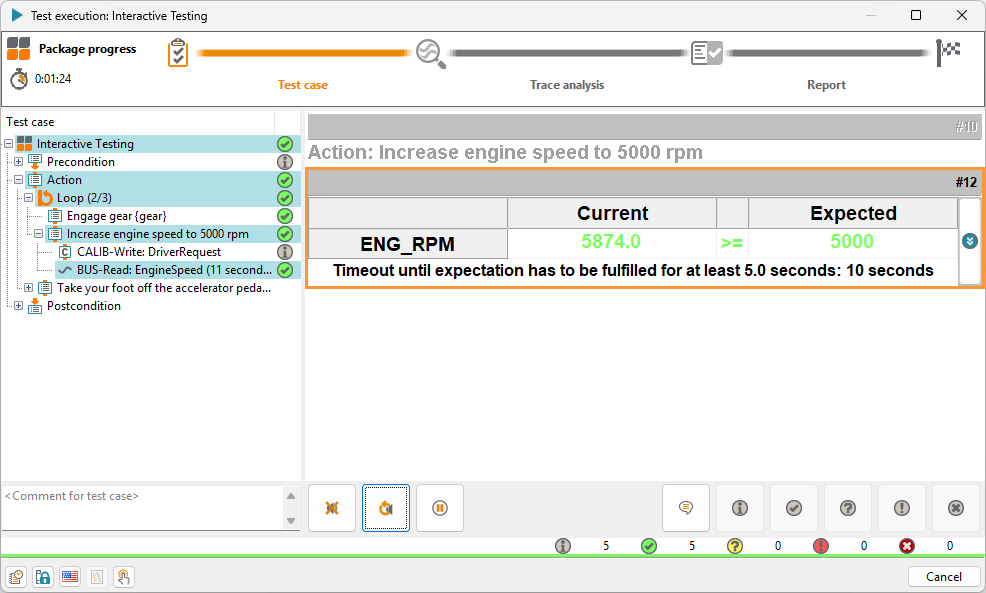
However, if a block contains subsequent test steps, it will be read out loud, but its result is determined by its children. This allows to write tests that combine manually and automatically executed parts, while giving the user feedback about the automatic parts.
In the current example the engine speed is represented by a bus signal, and the value is read using a mapping variable. You will find this procedure in real test cases too.
Execution as project
The project Interactive Testing.prj references the test case and changes test parameters using parameter sets. The project is executed interactively via the start button with the speaker symbol in the project toolbar (or via keyboard shortcut F6).