Tutorial OpenSCENARIO Workflow with scenario.architect
Info
The workflow described below is currently only supported by the environment simulation tools VTD and CarMaker. The functionalities are limited exclusively to scenarios of the type OpenSCENARIO 1.0 (*.xosc).
This tutorial describes how to create or edit XOSC scenarios with scenario.architect directly out of the respective tool connection. Afterwards the scenarios can be parameterized in ecu.test.

Configuring the tool connection (TBC and TCF)
The functionalities described above are only available as part of an “environment simulation access”. To set up such an environment simulation access, it is necessary to create a new test bench configuration (TBC) for the corresponding environment simulation tool (tutorial). A port of type “ENVSIM” has to be selected for the corresponding tool. The option Copy local directory to tool host has to be selected under Project directory in the properties of the tool connection. Choosing this option, the “truth” of the project directory is located locally on the ecu.test host. When the TBC is started, the local project directory is then copied to the tool host.
Warning
Exception for VTD: If a Local project source directory is copied to the VTD toolhost, folders with the same name in the path specified in Project directory on VTD toolhost will be overwritten.
To complete the setup of the environment simulation access, a test configuration (TCF) has to be created and configured according to this description.
When the new TBC and TCF are started, an environment simulation tab appears in the action window. The scenarios of the project directory are listed under the Scenarios node.
Create or edit scenarios with scenario.architect
Info
This step requires an installation of scenario.architect in a version greater than or equal to 2023.4.
The scenario.architect can now be started from ecu.test via the environment simulation tab. This allows for new XOSC scenarios to be created. Alternatively an existing XOSC scenario can be edited this way. In both cases, the new or edited scenario is automatically updated on the tool host after closing scenario.architect.
Creating a new scenario
The option Create new scenario in scenario.architect … appears when you right-click on the Szenarios node.

Warning
Routes (XODR files) that are referenced in the new scenario have to already be located in the local project directory at the start of the tool connection.
Edit existing scenario
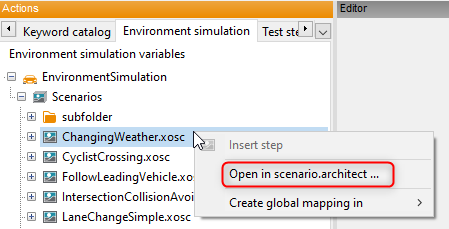
The option Open in scenario.architect … appears when you right-click on a XOSC scenario under the Scenarios node.
Parameterization in ecu.test
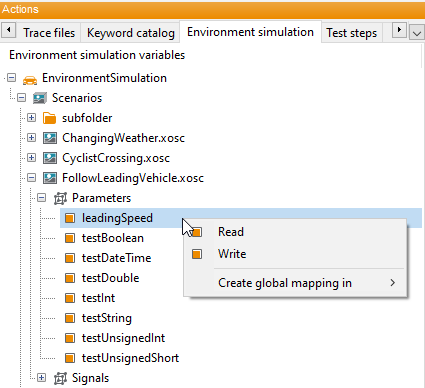
If an XOSC scenario in the Scenarios node is expanded, its parameters and signals can be viewed. When you right-click on a parameter when a package is open in the editor, an option appears to insert a read or write step for that parameter. Before a read or write step, the corresponding scenario has to be loaded with a “Load element” test step.
The parameterized scenario can then be started with the test step Start simulation or stopped with the test step Stop simulation.
Info
For VTD it is not possible to write parameters during the simulation.