VI Integration
ecu.test comes with built-in LabVIEW support, that provides (synchronous or asynchronous) execution of LabVIEW VIs.
Info
Currently only the English end German versions of LabVIEW are supported. Using a version in another language may cause errors.
Configuration of LabVIEW VI in test bench configuration
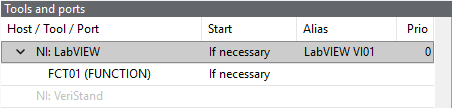
Open the test bench configuration editor and select/ create a configuration. Select “Show all available tools” on the tool host, on which LabVIEW is installed (e.g. on item “local” if LabVIEW is installed on the local machine). After this “LABVIEW VI” should show up in list of tools.
If LabVIEW is placed on a remote machine, you need to install and start Tool Server on that host first. Afterwards you can create a new tool host item for that machine and find “LABVIEW VI” in the tool list of that item.
Right click on the “LABVIEW VI”-Item and select from the context menu. Select type “FUNCTION” in the shown dialogue and finish with OK. Select the “LABVIEW VI” item again and fill in the only mandatory option “Search path”. There you have to specify the (root) folder where your vi-Files can be found. After that the test bench configuration is finished, so you can close the editor by pressing Activate.
Configuration of Function access items in test configuration
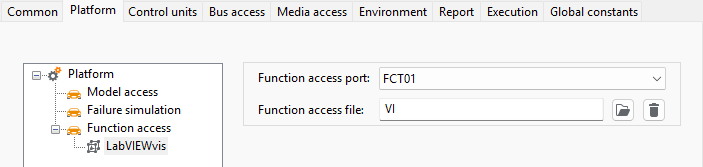
Open the test configuration editor and select the desired configuration file or create a new one. Select the Platform tab and create a new function access item. You need to assign the function port created in the test bench configuration(e.g. FCT01) and enter an arbitrary name for the cache file. ecu.test scans the folder specified in the test bench configuration for vi files and query their parameter names and types from LabVIEW. The collected information is stored in the cache file. After that you are done with the test configuration, so you can close the editor by pressing OK.
Loading the created configurations
After closing the editor you are back in the configuration perspective. The configurations you just created/ modified should be selected and highlighted in orange. If that is not the case, select them. Push the START TEST ENGINE-Button. If the initialization of your configurations was successful, a new tab “Function access” will show up in the action window on the left side (test development perspective).
Calling VIs in a test case
On the Function access tab all VIs and their parameters are listed. To create a test step that calls/ executes a VI right click the VI and select from the context menu. In the opening test step dialog there is only one option to be set. Choose “ExecuteSynchronous” if you want your test step to start the VI and wait for its termination (this is the most common use case and should be your first choice). If you want to execute further test steps while the VI is running choose “ExecuteAsynchronous”. If you want to modify parameters of an asynchronously started and still running VI select “InteractAsynchronous”. Parameterisation is done by inserting WRITE test steps for the VI’s parameters in the IN block of the EXECUTEFUNCION test step. Just select the IN block in the test case editor, then select a parameter of the VI in the “FUNCTION” tab and execute “Write” from the context menu. Enter the desired parameter value in the shown dialogue. If you want to read a VI’s parameter just insert a “Read” test step for that parameter in the OUT block.

Specific test steps
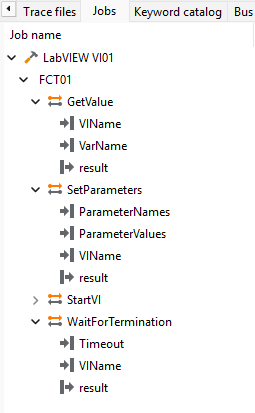
Further specific test steps for VI control can be found on the Jobs tab.