How to create a package with a trace analysis
Now let us make a very simple analysis of a measurement recording.
For the signal “CarSpeed” recorded in file testlauf.mdf it shall be checked whether an
upper threshold (e.g. 75 km/h) is adhered to. If the threshold is exceeded, the timestamps of the
violation should be determined.
First we create a new (empty) package by means of the menu (see figure Create a new package).

Create a new package
A new package appears in the package view (on the right) (see figure The empty package Package 1). The asterisk in front of it shows that it is in fact a newly created package.
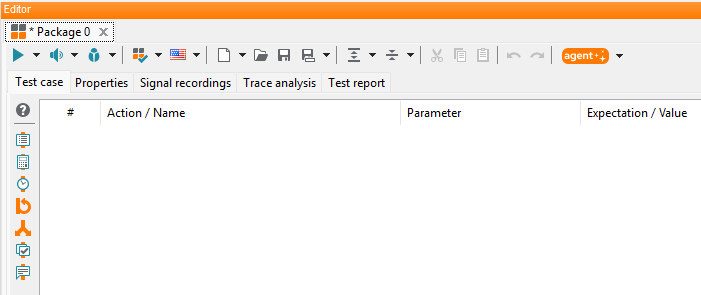
The empty package Package 1
Selection of trace files and signals in tab “signal recordings”
In then action window tab Trace files we now look for the mentioned file
testlauf.mdf in the folder Traces/SpeedGearEng and drag it into the empty section
of the package editor tab Signal recordings
(see figure Selection of trace file testlauf.mdf via drag-and-drop).

Selection of trace file testlauf.mdf via drag-and-drop
Due to the fact that we have only recorded one device (“device”), it doesn’t matter if we choose “_All_” or “device” from the selection dialog for devices.
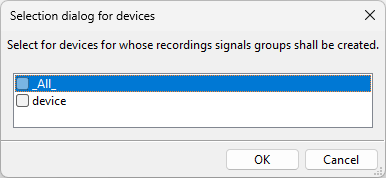
Selection dialog for devices
After that action, we can see a new signal group “device” (see figure The newly created signal group “device”), which, if required, can be renamed, customized and expanded (see Manual).
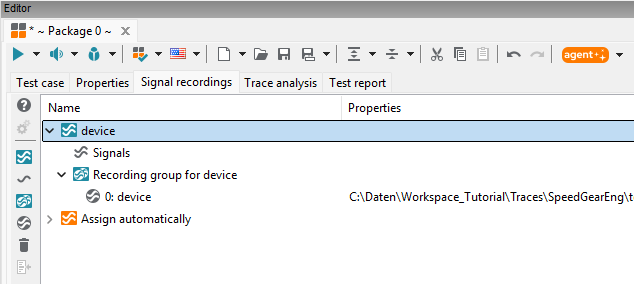
The newly created signal group “device”
As we can again see in the explorer view, the file testlauf.mdf contains three recorded
signals “CarSpeed”, “EngSpeed” and “Gear”. To analyze, as planned, the signal “CarSpeed”,
we now integrate it, for example via drag-and-drop, into the signal group device
(see figure Adding the signal “CarSpeed” via drag-and-drop).
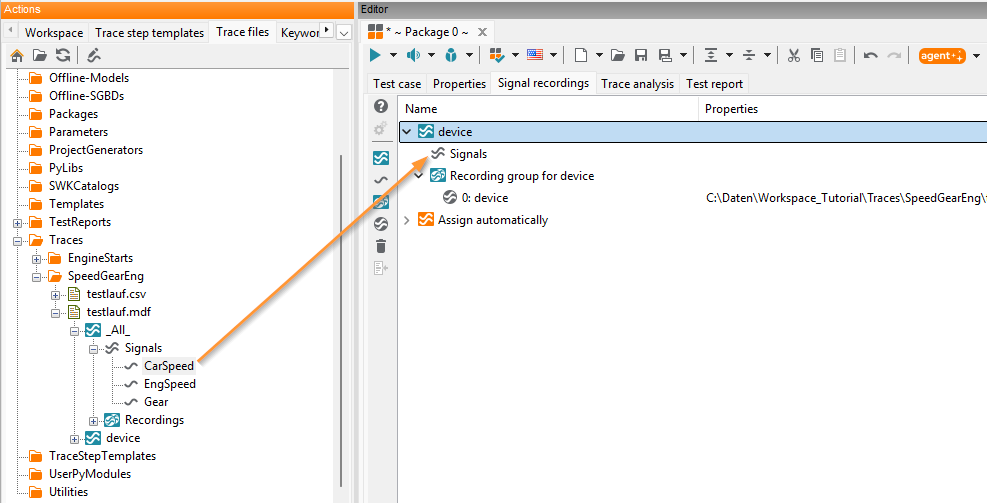
Adding the signal “CarSpeed” via drag-and-drop
We change into tab Trace analysis and set up a new trace analysis by clicking on the outer left symbol (see figure Composing a new trace analysis). We keep the suggested name “Trace analysis 1” by confirming with OK.

Composing a new trace analysis
At Signal connection we create a new generic signal (see details in the Manual), to which we then assign our concrete signal “CarSpeed” (see figure Assigning the concrete signal “CarSpeed”).
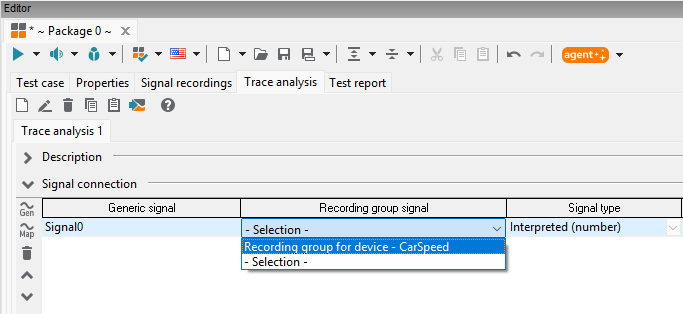
Assigning the concrete signal “CarSpeed”
Signal Analysis
- Method 1:
Using calculation steps for quickly creating trace analyses (especially suited for simple analyses)
- Method 2:
- Method 3:
Creating and using an event-based Python trace step template
Info
Array-based NumPy trace step templates work more efficiently, offer more possibilities, and usually allow easier implementation than event-based Python trace step templates. They should therefore be preferred over event-based Python trace step templates.