Lesson 1: First startup and first test case
In this lesson, you learn the basic workflow in ecu.test: workspace creation, create a package, run test case, and evaluate the result in the Report Viewer.
At the end of this exercise, your first own test case runs in ecu.test, and you know where to view the test result.
The goal is not yet to understand every term and interaction concept in detail, but to get a feeling for how working with ecu.test is structured into clear steps.
Create a workspace and copy sample data
When you start ecu.test for the first time, a workspace is created. The workspace is the base directory for all files used by ecu.test.
For this lesson, it is sufficient to keep the suggested workspace path in the Select workspace field.
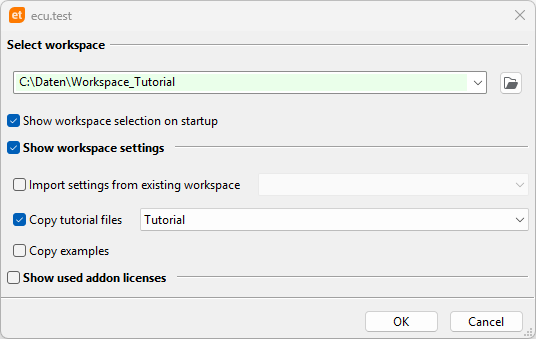
Additional data is required for the examples in this lesson.
Enable the checkbox Show workspace settings.
Enable the checkbox Copy tutorial data.
Select Tutorial in the drop-down menu.
Confirm with OK.
ecu.test starts and automatically creates the workspace directory structure. The sample data is then available.
Find your way around the user interface
After startup, the ecu.test user interface is shown. For getting started, only three areas are relevant:
Action Window
Editor
Configurations
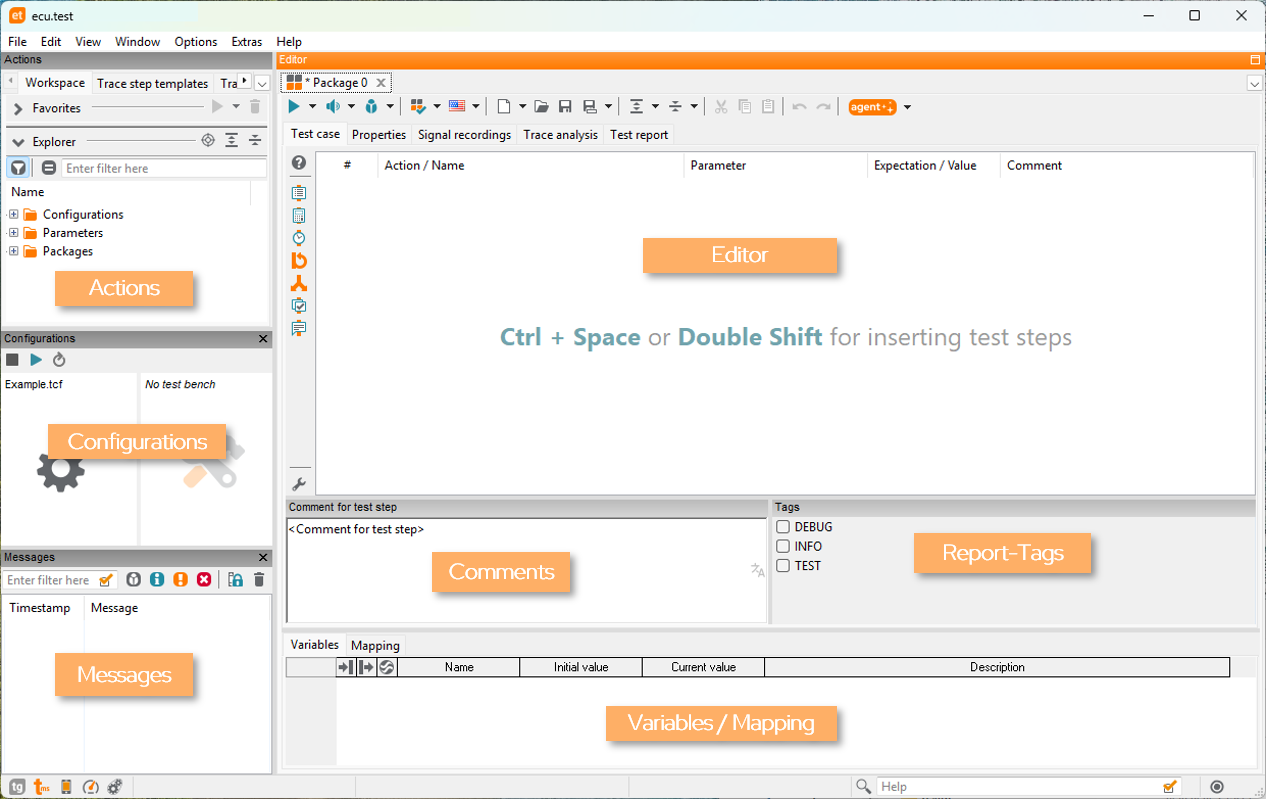
A complete overview of all windows is not necessary at this point. For now, it is enough to recognize these three areas and understand their role in the workflow.
Create the first package
To create a test case, you need a Package in ecu.test. A package is the container for all test steps of a test case.
Create a new package: .
An empty package opens in the Editor. This package is already executable, but it does not contain any test steps yet.
Add the first test step
In the next step, you add a simple test step. It checks whether the expression
5 + 5 returns the expected value 10.
For this purpose, use the Calculation test step.
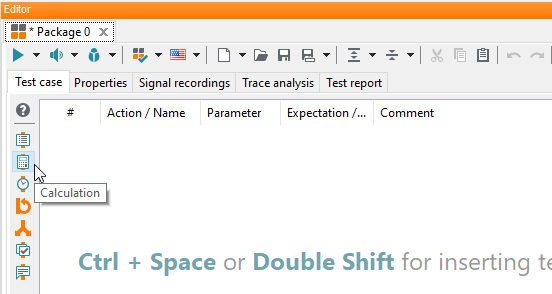
Insert a Calculation test step using the package toolbar.
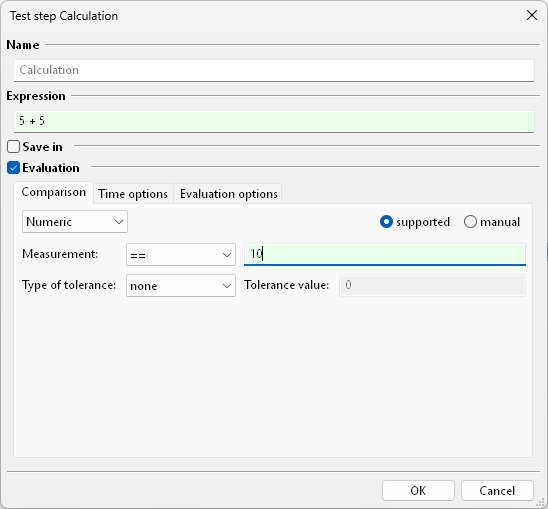
Enter the following Python expression in Expression:
5 + 5.To evaluate the result, you also need to define an expectation.
Enable the Evaluation option.
Enter
== 10as the expectation in Measurement.Confirm with OK.
The test step is now fully configured.
Execute the test
When you execute the package, ecu.test starts the test case and then generates a report with the test results.
In the package Editor, click Run test case or press F9.

The test case is executed. The result is shown in the Test report tab.
Evaluate the test result in the report
The Test report provides a direct link to the test steps so that you can quickly see which step succeeded and where an error occurred. The report also provides a summary of the entire test run.
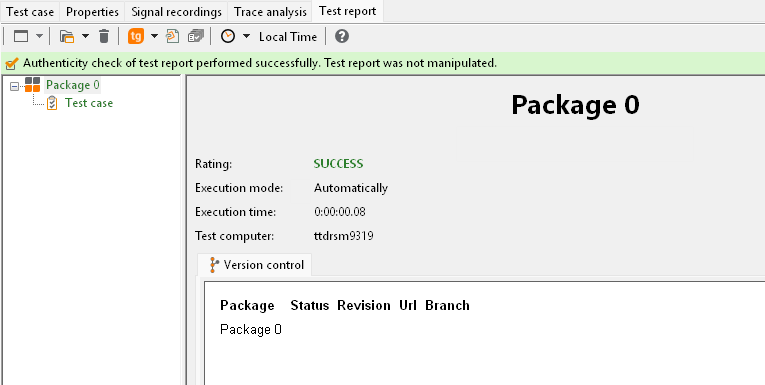
In the report, verify that the calculation test step has status SUCCESS.
The status SUCCESS shows that the expectation is fulfilled.

In the report navigation, click the top node to show the test run summary.
The overview shows the summary of the test result.
Save the package
You can save the created package and open it again later.
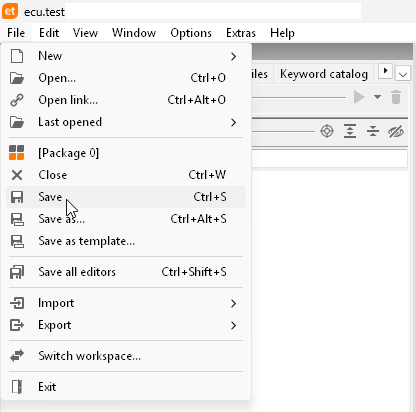
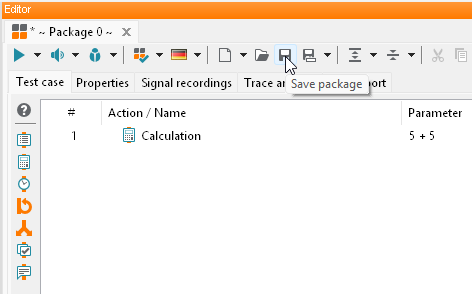
Save the package using one of the following options:
in the menu or
the Save package button or
the keyboard shortcut Ctrl+S
The file explorer opens in the
Packagesfolder of the configured workspace directory.Enter a name (for example
FirstTestCase).Confirm with Save.
The package appears in the ecu.test workspace explorer under Packages and can be
opened and edited again from there.
Result of lesson 1
In this lesson, you started ecu.test with a sample workspace, created a package, defined a simple test step, executed the test case, and evaluated the result in the test report.
The example is intentionally simple. It does not yet access test quantities of an SUT (System under Test) or model.
Outlook:
In the next lessons, you create a more realistic test case with read and write access to test quantities based on configurations.
Continue with Lesson 2.