Lesson 4: Working with mappings
In this section, you will learn the mapping concept and migrate the test case from Lesson 3 to use it. Instead of direct model paths, you use abstract names that are managed centrally.
At the end of this lesson, your test case still runs unchanged although all resolution is now done via a global mapping. You also change one mapping target and verify the effect in the Report Viewer.
Prerequisites:
Lesson 3 is completed.
A package such as
EV_Testwith write, wait, and read test steps is available.The configurations were created, selected, and started as described in Creating a new test bench configuration in the test bench configuration editor and the test configuration editor.
Mapping concept basics
In Lesson 3, model quantities such as driverRequest and velocity were accessed directly. In real projects, signal paths, model versions, or software states change regularly. Without mapping, all affected test steps in every test case would need manual updates.
This is exactly where the mapping concept helps. It separates the name used in the test case from the concrete target quantity:
- Mapping name
The abstract identifier used in the test case.
- Mapping target
The concrete quantity referenced by the mapping name.
If the target quantity changes, only the mapping is updated. The test case stays unchanged and can be reused with different mappings.

Signal handling with mappings
In this lesson, we will only make use of global mappings. Global mappings are the preferred option for reusable tests. They are stored in an XAM file and integrated centrally in the test configuration.
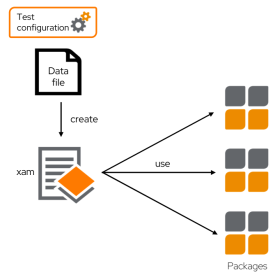
Mapping names are defined centrally and reused in multiple test cases.

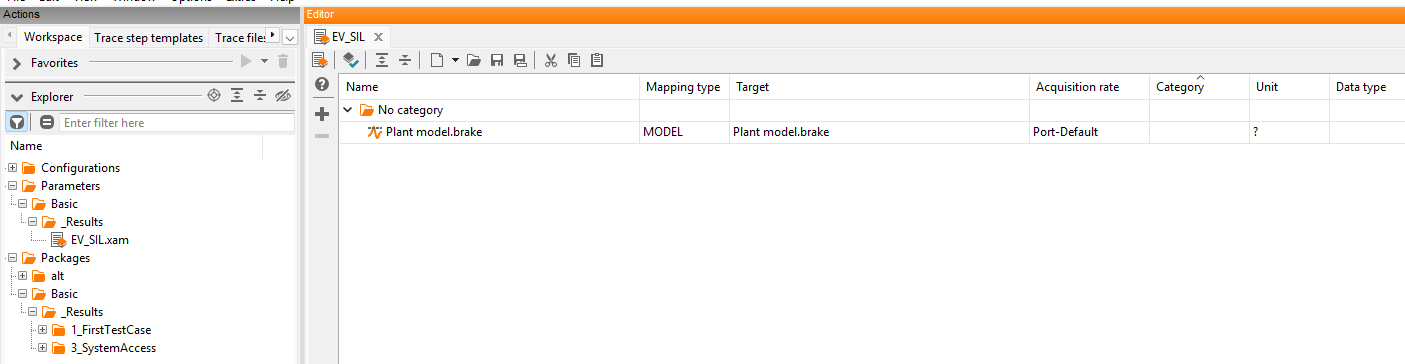
Example of an XAM file: The “Name” column contains the abstract mapping name, and the “Target” column contains the path to the specific target in the system under test.
Create global mapping
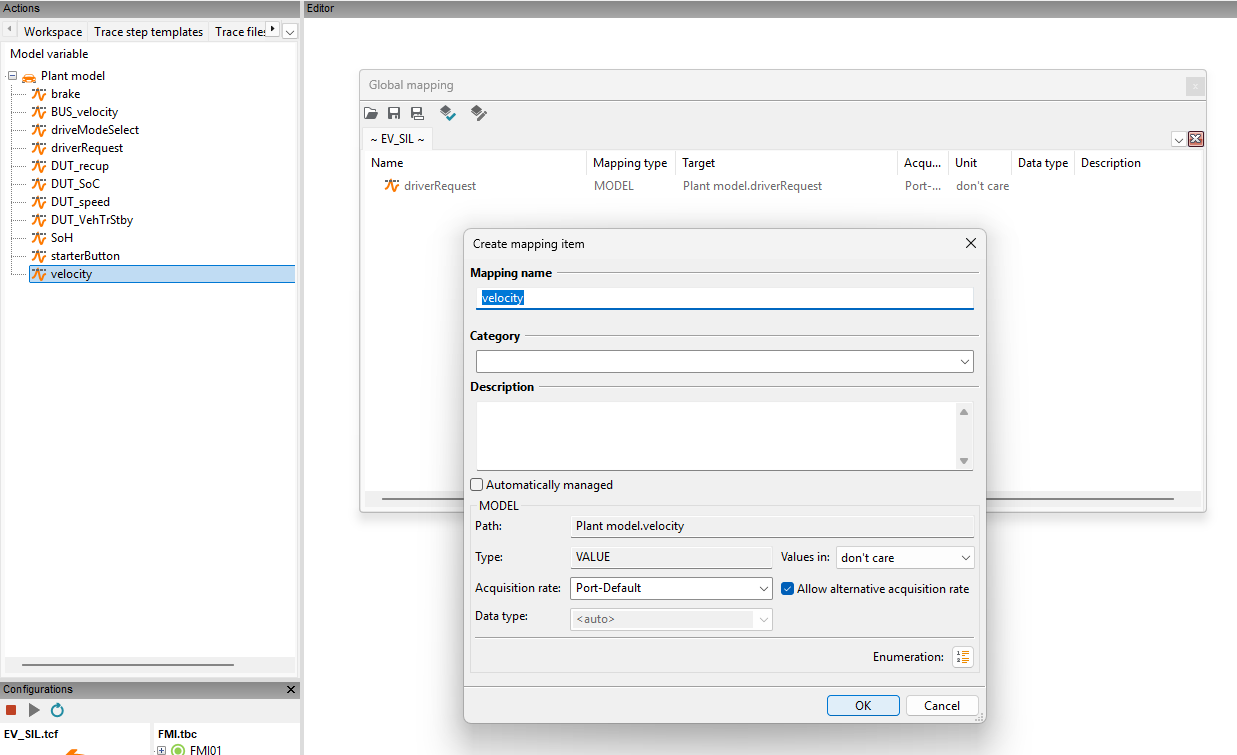
Open the Global Mapping window via .
Drag and drop driverRequest and velocity from the Model Access tab into the global mapping.
Check the suggested mapping names. Remove prefixes such as
Plant model.if needed, then confirm with OK.
You now have entries for both quantities with mapping name and mapping target.
Info
You can dock the Global Mapping window permanently via drag and drop. Drag it to the desired location (where a blue highlighting will appear).
Save a global mapping as a XAM file
Save the global mapping under any name, for example
EV_SIL.xam.
The file is stored in the Parameters directory of your workspace.
Integrate the XAM file into the test configuration
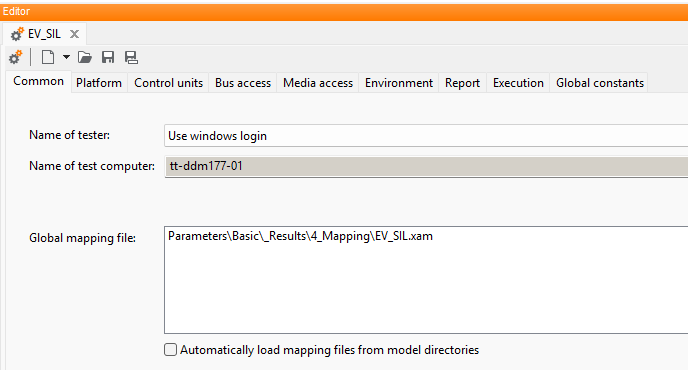
Open the test configuration from Lesson 2, for example
EV_SIL.tcf.Enter the XAM file in the General tab in the Global mapping file field.
Save the test configuration and close the editor.
On the next test configuration start, the global mapping is loaded automatically.
Convert an existing test case to a mapping
Now convert the test case from Lesson 3 in the editor to use global mappings.
Open the package, for example
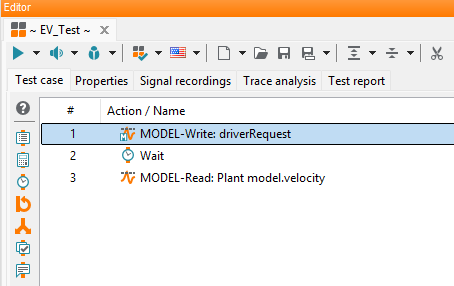
EV_Test.pkg.Drag the mapping entry driverRequest onto the write test step in line 1.
Drag velocity onto the read test step in line 3.
Save the package.
A small M marker appears on converted steps to indicate global mapping usage. The test case now uses mapping names instead of direct model paths.
Info
Use global mappings whenever possible when creating new test cases. This makes it much easier to make adjustments later on.
Restart configurations
Changes to a loaded test configuration become effective only after a restart.
Click Stop in the Configurations window.
Then click Play to start configurations again.
Execute test case and verify mapping in the report
Press F9 or click Run test case in the package editor.
The test case runs with SUCCESS as in Lesson 3. In addition, the report shows which mapping name was used and to which target it was resolved.

Adjust global mapping
The key benefit of mappings is easy maintenance: instead of changing the test case, you only change the target assignment in the mapping.
In this example, speed should no longer be read from Plant model.velocity but from
Plant model.BUS_velocity.
Open the XAM file in the Mapping file editor.
Drag the new quantity from Model Access onto the existing entry in the Target column.
Save the file.

In the next run, the report shows the new mapping target. The test case itself remains unchanged.
Result of lesson 4
You have adapted the test case from Lesson 3 to use a global mapping and integrated the XAM file into the test configuration. You also changed a mapping target and verified the effect in the report.
This makes tests more robust against changes in the system under test and improves reuse.
For advanced topics such as local mappings, parameterized mapping via package references, or prioritization, see the user documentation for the mapping concept, the global mapping, and the mapping file editor.
For result analysis, report generators, signal recordings, and the trace analysis are also useful.
Continue with Lesson 5.